

Salt Bread (Shiopan)
Salt bread, known as shio pan in Japan and sogumbbang in Korea, is the bread that took over every Asian bakery for good reason. Each roll is wrapped around a chunk of cold butter that melts as it bakes, frying the bottom to a crisp golden base while keeping the inside impossibly soft and fluffy. Salty, buttery, and pillowy all at once, it’s genuinely one of the best things to come out of a home oven!

Why You’ll Love This Recipe
- Crispy, buttery bottom with a pillowy soft inside
- Simple ingredients you probably already have
- Bakery quality results at home
- Freezes beautifully — make a big batch and reheat anytime
- Completely customizable with different fillings and toppings
- The recipe I’ve tested hundreds of times and trust completely
My Latest Videos
Salt Bread (Shiopan): The Japanese Bakery Roll That Became a Global Obsession
I have a pretty deep history with this bread. A few years ago I ran a salt bread home bakery on Instagram called @saltery.atx, where I spent months making tray after tray of these, testing different ratios, fillings, and techniques until I understood every variable that affects the final result. This recipe is the formula I landed on after baking thousands of these rolls. I’ve tested so many versions of salt bread with different ratios, techniques, steam levels, and even different oven types, and it’s honestly the bread that has taught me the most about dough. It showed me how small changes to fat, hydration, temperature, mixing time, and the baking environment all affect the final result!

Salt Bread Ingredients
THE DOUGH
- 400g bread flour
- 120g cake flour
- 365g cold water
- 26g sugar
- 10g salt
- 30g non-fat milk powder
- 40g cold unsalted butter
- 7g instant dry yeast
FOR SHAPING AND BAKING
- 12 x 15g butter chunks (about 1.5 sticks of butter, cut into even pieces)
- Pretzel salt for topping

The Dough
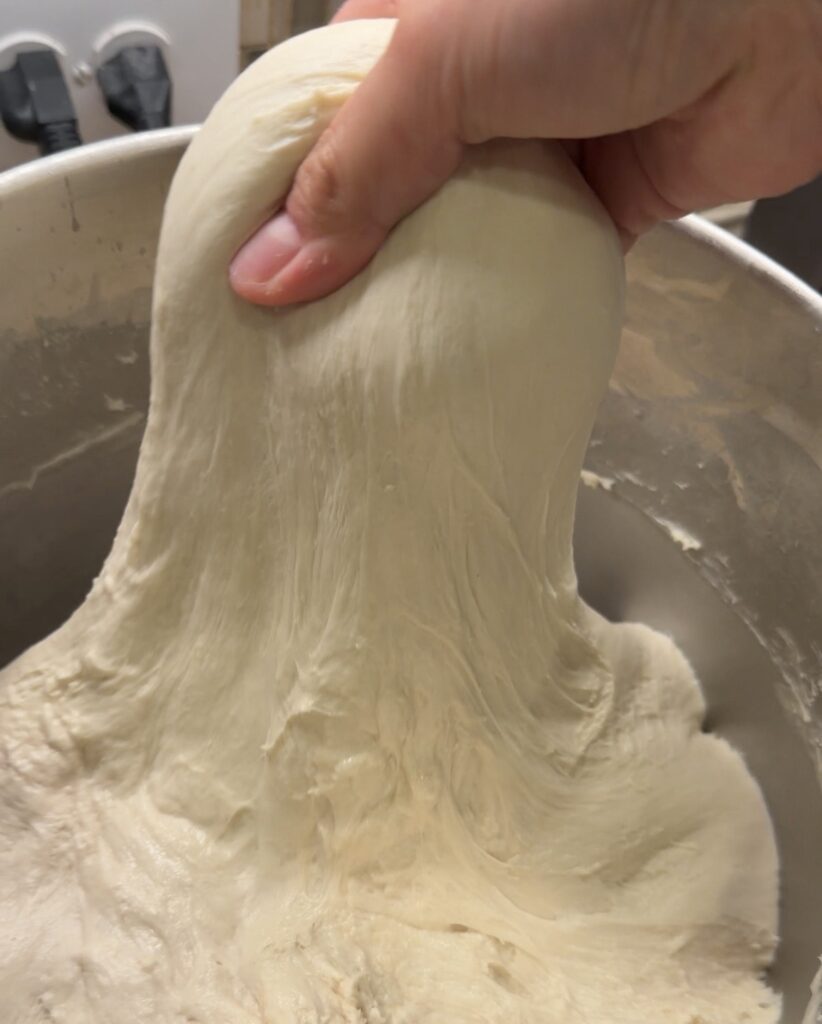
The combination of bread flour and cake flour gives you structure without making the rolls too chewy. The cold water is important (more about this in the next section)! Your stand mixer generates heat as it kneads, and starting cold keeps the dough in the right temperature range so the gluten develops properly. Same goes for the butter. You want it straight from the fridge, not softened. Don’t panic if the dough looks messy and sticky at the start, that’s completely normal! Once the gluten fully develops after 15 to 25 minutes of kneading, the dough transforms into something smooth and elastic on its own WITHOUT adding any extra flour.

How to Calculate Your Water Temperature
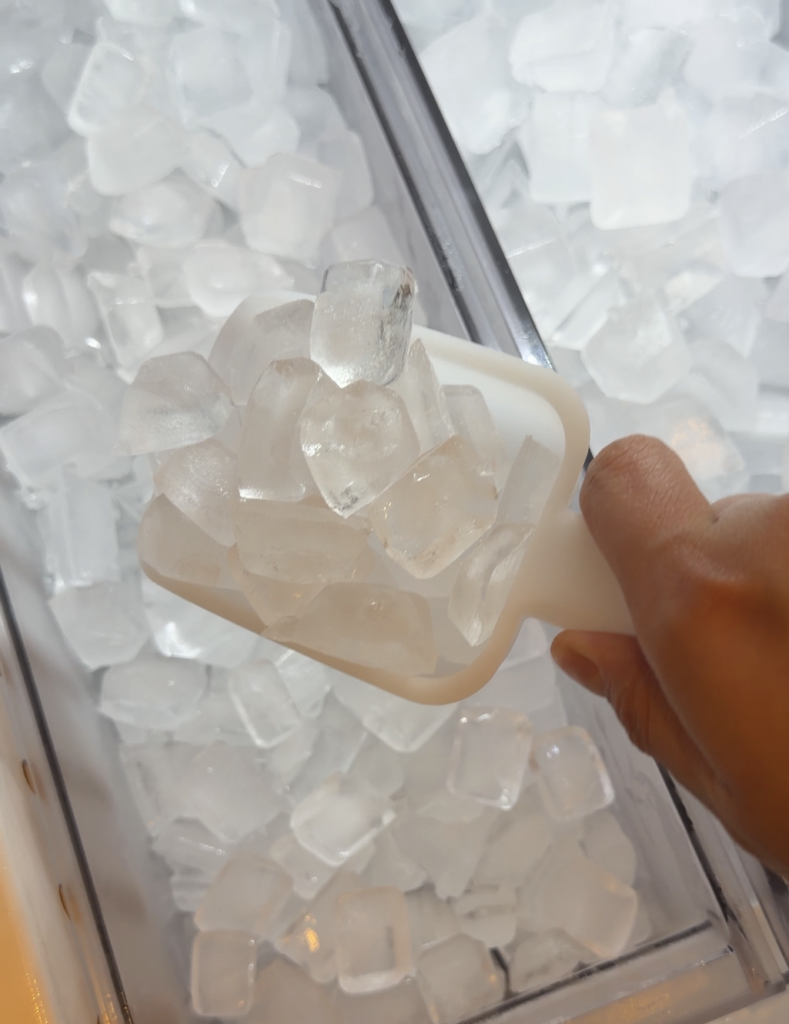
Cold water is non-negotiable for this recipe, but how cold depends on your specific environment and mixer. The goal is to finish kneading with a dough temperature between 78°F and 80°F. Once your dough goes past 82°F the gluten starts to weaken, which is exactly what makes the dough feel sticky and slack even after a long knead.
The Formula
The way to control your final dough temperature is to adjust your water temperature before you start. The formula bakers use is:
Water Temp = (Desired Dough Temp x 3) – Flour Temp – Room Temp – Friction Factor
This works because your flour temperature, room temperature, and water temperature are the three variables that contribute to your final dough temperature — and water is the only one you can actually control before you start mixing.
The Friction Factor
The friction factor accounts for the heat your mixer generates during kneading. Spiral mixers run cooler and more efficiently than planetary mixers so the friction factor is lower:
- Spiral mixer (like the Ooni Halo Pro): ~20°F
- KitchenAid or planetary mixer: ~25-30°F
Example Calculations
My setup — 77°F kitchen, Ooni Halo Pro spiral mixer: (79 x 3) – 77 – 77 – 20 = 63°F Cold tap water or very lightly iced. Cold butter straight from the fridge adds another buffer against warming.
Cooler kitchen — 65°F room temp, spiral mixer: (79 x 3) – 65 – 65 – 20 = 87°F Warm tap water is perfectly fine. Ice would actually work against you here.
KitchenAid user — 77°F kitchen: (79 x 3) – 77 – 77 – 28 = 55°F You need ice water. If your dough is still getting too warm, chilling your flour in the fridge for an hour before mixing is a legitimate fix.
The Bottom Line
There’s no single water temperature that works for everyone. Plug your own numbers into the formula and adjust from there. If your kitchen runs warm you may also need to refrigerate your flour before mixing to bring that variable down too.
The Butter Chunks
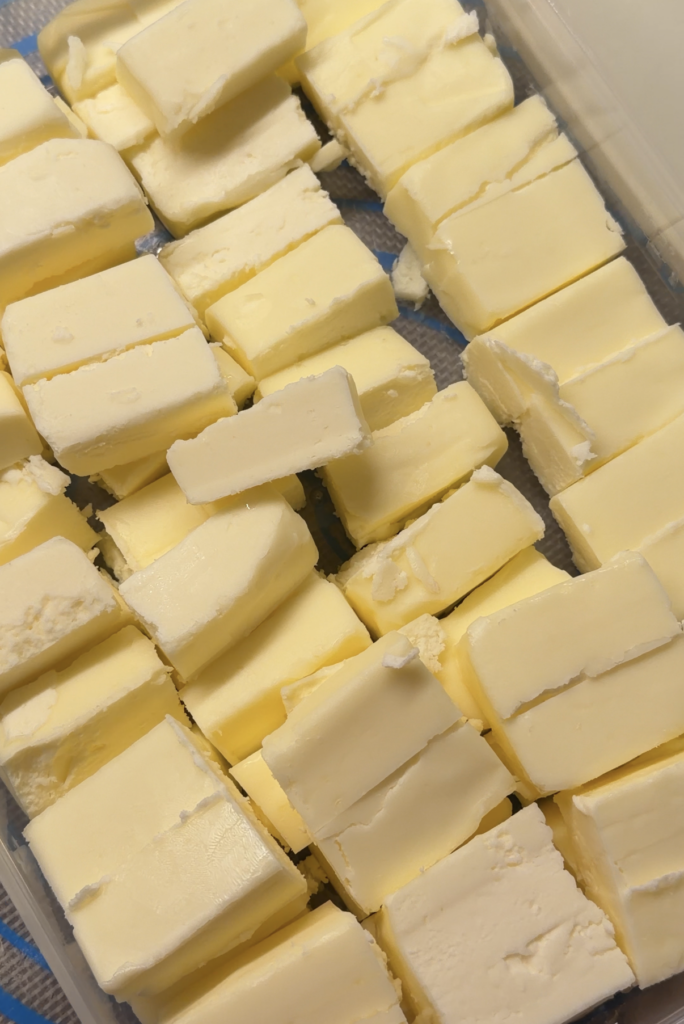
The butter chunks are what make salt bread salt bread. Each roll gets one piece of cold butter tucked inside at the wide end before rolling. As the rolls bake at high heat the butter melts and pools at the bottom of each roll, essentially frying the base from underneath.
Keep your butter chunks in the fridge the entire time you’re shaping! Only take out a few at a time as you need them. Cold butter is essential here. If the butter warms up and starts to soften it will smear into the dough during rolling rather than staying as a clean chunk and you won’t get that same pooling effect in the oven. Go back to the fridge between every few rolls if needed.
For the pretzel salt on top a few flakes go a long way. It adds a crunch and a little burst of salt with every bite that makes the whole roll come together.
The Baking Tray
This is more important than most people realize. You must bake salt bread directly on an unlined non-stick tray — no parchment paper. Parchment traps the butter underneath the rolls and steams the bottom instead of crisping it. You want direct contact between the melted butter and the hot pan so it can fry that base to a crispy golden finish. BUT make sure your tray is truly non-stick. A plain aluminum tray will cause the rolls to stick badly. If an aluminum tray is all you have access to, I recommend spraying it lightly with oil, but investing in a good non-stick tray is worth it if you plan to make these regularly.
How To Make Salt Bread (Shiopan)
- In the bowl of a stand mixer, combine bread flour, cake flour, sugar, salt, milk powder, yeast, and cold water. Mix on low with a dough hook until a shaggy dough forms.
- Add the cold butter straight from the fridge and increase to medium speed.
- Knead for 15 to 25 minutes until the dough is smooth, elastic, and passes the windowpane test — stretch a small piece thin enough to see light through without it tearing. The dough will look very sticky at first. Keep going and do not add extra flour.
- Shape the dough into a smooth ball, place in a bowl, cover, and let rise until doubled. (If you want to cold proof your dough, place your dough in the fridge before the first rise.) Test it’s done proofing by poking with a floured finger, if the hole stays, it’s ready.
- While the dough rises cut your cold butter straight from the fridge into 12 even chunks of about 15g each. Place them all back in the fridge! Keep them refrigerated the entire time you’re shaping and only take out a few at a time as you need them. Cold butter is essential for getting that crispy fried bottom and big butter hole.
- Once risen degas the dough and divide into 80g portions. Roll each into a smooth ball. Start your 15 minute timer as soon as you finish rolling the first ball, by the time you’ve rolled all 12 the first one will have had its full rest. Cover all the balls and do not let them sit longer than 15 minutes! You’re just relaxing the gluten to make shaping easier, not proofing further.
- Before shaping, smear a very thin layer of softened butter onto your work surface. This helps the dough detach cleanly without adding flour which would tighten the dough. If your dough is properly proofed, this step isn’t necessary but it can help if you’ve been struggling with sticking during shaping.
- Working one ball at a time roll each into a long teardrop shape. Using a rolling pin flatten the narrow bottom half first while gently pulling downward, then flatten the wider top into a triangle base about the width of your butter chunk. If the dough tears against the surface rather than rolling smoothly your dough may be overproofed — see the troubleshooting section for help.
- Place a butter chunk at the wide end and roll down toward the point with gentle tension. Place seam side down on a non-stick baking tray with no parchment paper.
- Cover and let rise until doubled and puffy. Again use visual cues over time, the rolls should look noticeably puffed and feel light and airy when you gently shake the tray. To check if they’re ready gently poke the edge of a roll with your finger. If the indentation springs back slowly and partially the rolls are ready to bake. If it springs back immediately they need more time. If it doesn’t spring back at all and the indentation just stays the rolls are overproofed. You want that slow, gentle spring back!
- Preheat oven to 450°F. My oven takes about 20 minutes to fully preheat and my rolls typically take about 1 hour for the final proof, so I turn my oven on 40 minutes into the final proof. This way the oven is fully up to temperature right as the rolls finish proofing and I’m not leaving them sitting around overproofing while I wait for the oven to catch up. Adjust the timing based on how long your oven takes to preheat.
- Spray rolls lightly with water and sprinkle pretzel salt on top. Just before loading into the oven, spray each roll generously with about 20 pumps of water.
- Lower the oven to 400°F and bake for 12 to 17 minutes, rotating the tray halfway through if needed. The bottoms should be deep golden and crispy, the tops glossy and evenly browned.
- Eat immediately. The bottoms are at their crispiest right out of the oven!

Cold Proofing Your Salt Bread Dough
Cold proofing, also called retarding, is a technique where you slow down fermentation by moving your dough to the fridge instead of letting it rise at room temperature. It’s a great option if you want to break up the process over two days, bake fresh bread in the morning without starting from scratch, or simply have more control over your schedule.
When to Cold Proof
I recommend cold proofing during the bulk ferment (right after kneading, before you shape the rolls). Shape the dough into a smooth ball, place it in a bowl, and cover it tightly with plastic wrap pressed directly against the surface of the dough or an airtight container like a cambro. Keeping air completely out is critical! Any exposed surface will dry out and form a skin that creates uneven tension in the dough and can cause tears when you try to shape it later.
The Morning Of
One of the best things about cold proofing during the bulk ferment is how streamlined the morning becomes. Take your dough straight out of the fridge and divide and portion it immediately! No need to wait for it to come to room temperature first. Proceed directly to the portion and bench rest step of the instructions. The dough will be cold and slightly firm which actually makes it easier to handle and shape. From there it’s just the final proof and bake, making fresh salt bread in the morning genuinely achievable without an early alarm.
How Long Does It Take
For this recipe, which makes 12 rolls, cold proofing in the fridge typically takes 8-12 hours at a standard fridge temperature of around 38-40°F. A good rule of thumb is to refrigerate overnight and shape in the morning. If you’re making a larger batch the dough will proof faster even in the fridge because a larger mass of dough generates more internal heat, so keep an eye on it and check after 6-8 hours if you’ve doubled or tripled the recipe. BUT time is just a guideline! What actually matters is the look of the dough. Check your dough after 8 hours but don’t pull it out based on time alone. You’re looking for the dough to have doubled in size just like you would at room temperature. Depending on your fridge temperature, the activity of your yeast, and how warm your dough was going in, this could happen faster or take longer than 8-12 hours. Every fridge runs slightly differently. If your dough isn’t quite there yet after the overnight cold proof don’t worry! Simply pull it out of the fridge and let it finish its rise at room temperature. Set it somewhere warm and check it every 30 minutes or so until it reaches that doubled size. This is completely normal and not a sign anything went wrong, it just means your fridge runs a little colder or your dough went in at a lower temperature. The flexibility of cold proofing is one of its biggest advantages, you’re never locked into a rigid timeline.
Why Dough Temperature Matters
As noted in this recipe, keeping your dough temperature in the right range during the kneading process is important. This matters just as much during cold proofing. If your dough was too warm going into the fridge (from a warm kitchen, warm water, or an extended knead that overheated the dough), it can continue proofing too quickly even in the cold. In that case you may find your dough has over-proofed or developed too much before you’re ready to shape it. Always aim to get your dough into the fridge as quickly as possible after kneading so the cold temperature can take effect before the yeast gets too active.
Can You Cold Proof After Shaping?
Technically yes, you can cold proof the shaped rolls, before their final proof. However it’s more difficult to execute well at this stage. The shaped rolls have much more surface area exposed and are harder to cover without disturbing their shape or allowing them to dry out. The best tool I could recommend for this is a pizza dough proofing box, a stackable tray with a fitted lid that keeps the shaped rolls completely enclosed, protected from airflow, and prevents any drying or skin formation while maintaining their shape perfectly. The upside with this is that cold shaped rolls go straight from the fridge to the oven with no additional proofing time needed, which makes for a very convenient same-morning bake.
Storage and Reheating
Salt bread is absolutely best the day you make it, especially in that first hour out of the oven when the bottom is still shatteringly crisp. If you have leftovers, skip the fridge entirely and go straight to the freezer — refrigeration dries out the dough and ruins the texture.
Freezing: place cooled rolls in an airtight bag and freeze for up to 2 months.
Reheating from room temperature: air fry at 350°F for 2 to 4 minutes.
Reheating from frozen: air fry at 350°F for 5 to 8 minutes, flipping halfway through so the bottom crisps back up. They come back beautifully.

Tips For Success
Steam matters more than most people expect. Spray each roll generously right before loading into the oven — about 20 pumps each. It gives the rolls a better oven spring, creates that signature glossy crust, and helps the pretzel salt stick.
Your oven also plays a bigger role than you might think. Salt bread is traditionally baked in deck ovens with intense bottom heat. I use a commercial convection oven which gives very even browning all around. If you’re using a home oven the bread will still taste incredible, but the browning and crust texture may look a little different from mine. A convection setting if you have one will get you closest to that even color.

Why Is My Salt Bread Dough So Sticky?
This is the most common question I get about this recipe, so if your dough still feels very sticky after kneading, here’s what’s actually going on.
It’s Normal at the Start
First, this dough starts out sticky no matter what because it’s a higher fat dough. Fat slows down gluten development, which means the dough takes longer to transform into something smooth and workable. Do not add extra flour. If you keep kneading it will come together on its own.
Your Mixer Matters
The biggest factor people overlook is their mixer. I use an Ooni Halo Pro spiral mixer and knead at around 55% speed. Spiral mixers are designed specifically for bread dough and are significantly more powerful and efficient than household planetary mixers. KitchenAid officially recommends kneading at Speed 2 only, with total kneading time not exceeding 4 to 6 minutes — which is nowhere near enough for this dough. If you push your KitchenAid past that, you risk burning out the motor. I used to use a kitchen aid mixer and I always ran mine at around speed 6, but I did end up burning my motor eventually, so proceed at your own risk.
One thing KitchenAid users can do to work around this limitation is develop the gluten more before adding the butter. Gluten forms from flour and water alone, and fat interferes with that process, so if you knead the dough without the butter first until it starts to come together and build some strength, then add the butter in, you’re giving the gluten network a head start before the fat slows everything down.
You May Have Overproofed Your Dough
An often overlooked cause of stickiness and tearing is overproofing. If your dough proofed too long during the bulk ferment the gluten structure weakens and the dough becomes slack and uncooperative. You’ll know immediately when you try to roll each ball into its teardrop shape. If the dough tears against the surface instead of rolling smoothly and holding its shape, overproofing is likely the culprit. Keep a close eye on your dough during the bulk ferment and use the poke test rather than relying on time alone. You’re looking for doubled in size, not more. The same applies to the bench rest! Don’t let it go too long either! The bench rest is only meant to relax the gluten enough to make shaping easier, not to proof the dough further. You’re not looking for any significant size change during this rest. I start my 15 minute timer as soon as I finish rolling the first dough ball, so by the time I’ve rolled all 12 balls the first one has had its full 15 minutes and I can go straight into shaping without any of them sitting too long. Work efficiently and don’t walk away from your dough during this step.
A Trick for Shaping
If you find the dough is sticking to your surface when it’s time to shape after the bench rest, try this! Right before you start shaping, smear a very thin layer of softened butter onto your work surface. Just a thin swipe is enough. It helps the dough detach from the surface much more easily as you’re rolling your teardrop shape without adding flour which would tighten the dough and change the texture. This is one of those small tips that makes a noticeable difference!
If It’s Still Not Working
If your dough is still struggling after a long knead, try dropping the butter from 40g to 30g next time. The rolls will still taste great and the dough will be much easier to handle.
If you don’t have a stand mixer at all, I have a full no-knead salt bread recipe that gives you the same result using stretch and folds instead.
BUT most importantly, keep trying! It took me hundreds of batches and a lot of trial and error to get this recipe to where it is today. There are so many variables involved with salt bread that I could honestly make an entire course on it. But that’s also what makes it such a valuable recipe to master! Every time you make it you’ll learn something new about dough, gluten, temperature, and fermentation that will make you a better baker across everything you bake.

Salt Bread (Shiopan)
Ingredients
- 400 g bread flour
- 120 g cake flour
- 365 g water ice water
- 26 g sugar
- 10 g salt
- 30 g non-fat milk powder
- 40 g cold unsalted butter, straight from fridge
- 7 g instant dry yeast
- 12 x 15 g butter chunks COLD, straight out of fridge! I cut 1 stick of butter into 8 pieces so you'll need around 1.5 stick of butter
- pretzel salt
Instructions
Make the dough
- In the bowl of a stand mixer, combine bread flour, cake flour, sugar, salt, milk powder, yeast, and cold water.
- Mix with a dough hook on low speed until a shaggy, cohesive dough forms.

- Add the unsalted butter (fridge-cold, not softened) and increase to medium speed.

- Knead for 15 to 25 minutes (may be longer depending on your mixer!) until the dough is smooth, elastic, and passes the windowpane test — stretch a small piece thin enough to see light through without it tearing. The dough will look very sticky at first. Keep going and you will not need to add extra flour!

First rise (bulk fermentation)
- Shape the dough into a smooth ball by rolling it taut.

- Place into a bowl, cover, and let rise until doubled in size.If you want to cold proof your dough, place it in the fridge before the first rise.
- Test readiness by poking the dough with a floured finger — if the hole stays without springing back, it’s ready. If it springs back immediately it needs more time. Do not overproof — you're looking for doubled, not more.

- While the dough rises cut your cold butter straight from the fridge into 12 even chunks of about 15g each. (1.5 sticks of salted butter bc 1 stick of butter = 8 chunks). Place them all back in the fridge! Keep them refrigerated the entire time you’re shaping and only take out a few at a time as you need them. Cold butter is essential for getting that crispy fried bottom and big butter hole.

Portion and bench rest
- Once risen degas the dough and divide into 80g portions.

- Roll each into a smooth ball. Start your 15 minute timer as soon as you finish rolling the first ball, by the time you’ve rolled all 12 the first one will have had its full rest. Cover all the balls and do not let them sit too long! You’re just relaxing the gluten to make shaping easier, not proofing further.

Shape the rolls
- Before shaping smear a very thin layer of softened butter onto your work surface, this helps the dough detach cleanly without adding flour which would tighten the dough. If your dough is properly proofed, this step isn’t necessary but it can help if you’ve been struggling with sticking during shaping.
- Working one ball at a time roll each into a long teardrop shape.

- Start with the bottom half of the tear drop shape (narrower part.) Use a rolling pin to flatten the bottom half while using the other hand to slightly pull downward.

- Do the same for the upper half to flatten the wider end into a triangle base about the same width as your butter stick.

- Place a butter stick at the wide end and roll down toward the point, gently tugging for tension.If the dough tears against the surface rather than rolling smoothly your dough may be overproofed — see the troubleshooting section for help.

Final proof
- Place rolls on non-stick baking tray (no parchment paper) with space between them.

- Cover and let rise until doubled in size. Again use visual cues over time, the rolls should look noticeably puffed and feel light and airy when you gently shake the tray. To check if they’re ready gently poke the edge of a roll with your finger. If the indentation springs back slowly and partially the rolls are ready to bake. If it springs back immediately they need more time. If it doesn’t spring back at all and the indentation just stays the rolls are overproofed. You want that slow, gentle spring back!
Bake
- Preheat oven to 450°F (232°C). My oven takes about 20 minutes to fully preheat and my rolls typically take about 1 hour for the final proof, so I turn my oven on 40 minutes into the final proof. This way the oven is fully up to temperature right as the rolls finish proofing and I'm not leaving them sitting around overproofing while I wait for the oven to catch up. Adjust the timing based on how long your oven takes to preheat.
- Spray rolls lightly with water and sprinkle pretzel salt on top.

- Just before baking, spray each roll generously (about 15-20 pumps) for added steam.
- Lower oven to 400°F (204°C) and bake for 12-15 minutes, rotating the tray halfway if needed for even browning.
Serve
- Enjoy hot out of the oven — the bottoms will be crisp and buttery, the insides fluffy and soft.





I’ve made this every week for the past two months, I’m obsessed. It’s perfect and pretty foolproof. The first couple times I made it, I didn’t let the crescents rise fully, but they still turned out amazing. I have made the recipe to the letter several times, but I have also experimented with putting less butter inside (for my health) and it still comes out great. I cut one stick of butter into twelve pieces, rather than 1.5 sticks. This bread also freezes super well. Thank you for this recipe, I’ve never had this much success making bread!
Delicious!! I had to add like 3 more mins bake time for color and the bottoms got a little too fried. How would you recommend adjusting bake temp and time if 12 mins at 400F (I did preheat at 450) if they’re coming out too pale? I don’t have a fan powered oven btw, it’s top/bottom heat.
Im not an expert baker but some options that come to mind are
-Dark colored pans absorb/transfer more heat, which could brown the bottoms more. You can try using a lighter colored pan.
-Move the oven rack to a higher position so the bread is closer to the top heating element.
In both cases, you can probably keep the same temperature and just keep an eye on the color for time. Hope it works well for you!
This is by far one of the best salt bread recipes I’ve tried. The recipe was easy to complete and follow!
I was wondering if i would be able to refrigerate/freeze the rolls before baking? If so, how long would I need to let them thaw & rise before baking?
I made a double batch of these for the freezer and they turned out great every time!
Unthaw overnight and leave in the fridge until you’re ready to bake. I left them out on the counter to rise for anywhere from 30min-2h. It’s pretty cold where I live so I expected they’d take longer but use your best judgement. Then, bake as instructed!
They rose slightly on the counter but puffed beautifully in the oven and have turned out so great each time.
The dough is pretty forgiving so you can definitely experiment to find the best results but this worked great for me!
Loved this so much!!!
It’s possible to do it without a stand mixer but make sure to have free time, a refrigerator near by, and a sturdy wooden spoon/spatula. It was an intense arm workout but the end result made it worth it!
hello! excellent recipe but i have a question about baking. i have a breville smart convection oven, which i think is similar to a commercial convection oven, but most recipes often say to reduce the heat by 25 degrees (50 if also using a dark pan!) to compensate for the convection setting. should i reduce the heat in this case? what setting should i use it on for best results? it has just regular bake, then convection and super convection. thank you!!
Sehr gutes Rezept. Alles hat perfekt geklappt 10/10
Hi!! I tried these and they came out really well. ( inspite of the fact that I used APP instead of bread flour oops. Had to make some adjustments there). Question though: do you even bake it at 450 F? Instructions say to preheat to 450 F and then to bake 12-15 minutes at 400 F. Is there a step missing there? I’d love to try these again for thanksgiving.( with the right flour this time lol)
Hi Erin,
My daughter and I tried your recipe and absolutely love it. We are on a quest to perfect it. Our shaping needs work for sure but we have managed to get some decent results so far.
Was wondering if you had your oven fan on with the temps mentioned in the recipe as ours did not brown up the same as yours did in the amount of time indicated. We will experiment further but thank you for sharing this to everyone.
simple and easy to follow recipe that yielded the most perfect salt bread!! :)) unsure of how science of it works but i used 300g of milk (+65g cold water) instead of the 30g of milk powder and it still came out amazing, definitely making these more and trying out the other salt bread variants ❣️
Came here after seeing the reel on instagram- what a great recipe. These turned out amazing- like an upgraded crescent roll. And surprisingly easy. Used flake salt instead of the pretzel salt as I didn’t have that on hand. Will definitely be making again!
GREAT RECIPE!! For how long can we store them in the freezer?
I made these yesterday and they were so yummy! I didn’t have a dark, non-stick pan so I put half on parchment paper and the other half directly on the pan, but greased with avocado oil to experiment. Both turned out super crispy still and I think it’s because I put the tray closer to the bottom of my conventional oven. I should’ve sprayed more water on top to make the tops more evenly brown. Otherwise, its very good!!
love this recipe- but should you tell us optimal stage for freezing?
after the bulk fermentation?
after rolling into balls?
after shaping into crescent shape BEFORE the final proof?
ideally i’d like to shape and freeze and gift then have them final proof and bake- is that possible?
Bake these!
Made these for Thanksgiving and they were a hit. The recipe is pretty easy to follow. The only part that was a bit opaque was the final shaping for the roll. Found part of a video on instagram but would be great to get a frame by frame or embedded video.
10/10. Perfect consistency and easy to make!
Made a double batch and the kitchen aid could fit it. But did it in 2 batches. Fantastic result. I wasn’t sure I could be successful on the first try! Crisp bottom. I froze the raw shaped dough for future quick snacks!
Reading this recipe along with watching the videos on tiktok make it so easy to bake salt bread. So so so good, I’m obsessed! My family love it too, made it three times in one week.
My favorite salt bread recipe ever!!! Everyone whom I’ve baked this for loves it and asks for more. I did this without a stand mixer using a stretch and fold method that I also use for sourdough and it works great (just takes a lottt more time but less strength than kneading it for 30 min straight)! Super easy recipe to follow and just tastes so amazing
Great recipe! I didn’t happen to have nonfat milk powder so I used buttermilk powder and that worked great!
turned out really good, and easy to make
I kneaded for a total of 36 minutes and the dough was very smooth but still a lot stickier than yours in the Reel. My Thermapen said it was 74 degrees so I think not a heat issue. Maybe some kind of ingredient weirdness? Or maybe it just takes forever in a KitchenAid. I do have the Pro version which is heavier duty. Windowpane test wasn’t quite there either – I guess maybe I should have kept going but it seemed like sooo long to be kneading. Thankfully my kitchen runs cold.
I had to use some flour for rolling, otherwise it stuck to my board and rolling pin. Not surprisingly, the texture of the final product was off – nice and soft but missing that crispy outside layer. Tasted pretty good though!
I guess I’ll try the no knead version the next time, lol.
Freaking delicious. I feel that I didn’t quite knead it enough as it was a little more than tacky when I began the first rise, but the final texture was still so tender and luscious. I was also worried by the final rise, as my breads maybe grew 50% in size rather than doubled. I also don’t have a non-stick pan so I used a parchment lined baking sheet and the butter ended up as a melty pool in the pan. but I gave all of the bottoms of the bread a quick fry in a non-stick to get the bottoms nice and browned and crispy and that took it to the top. delicious with either coarse salt and flaky sea salt. thank you!!
Hi Erin, do you have experience with an Ankarsrum mixer? Any insights if there’s any change on the recipe?
sooo yummy and such an easy recipe to follow!